Category
- Building Smart Apps
Creating Grid, List, and More
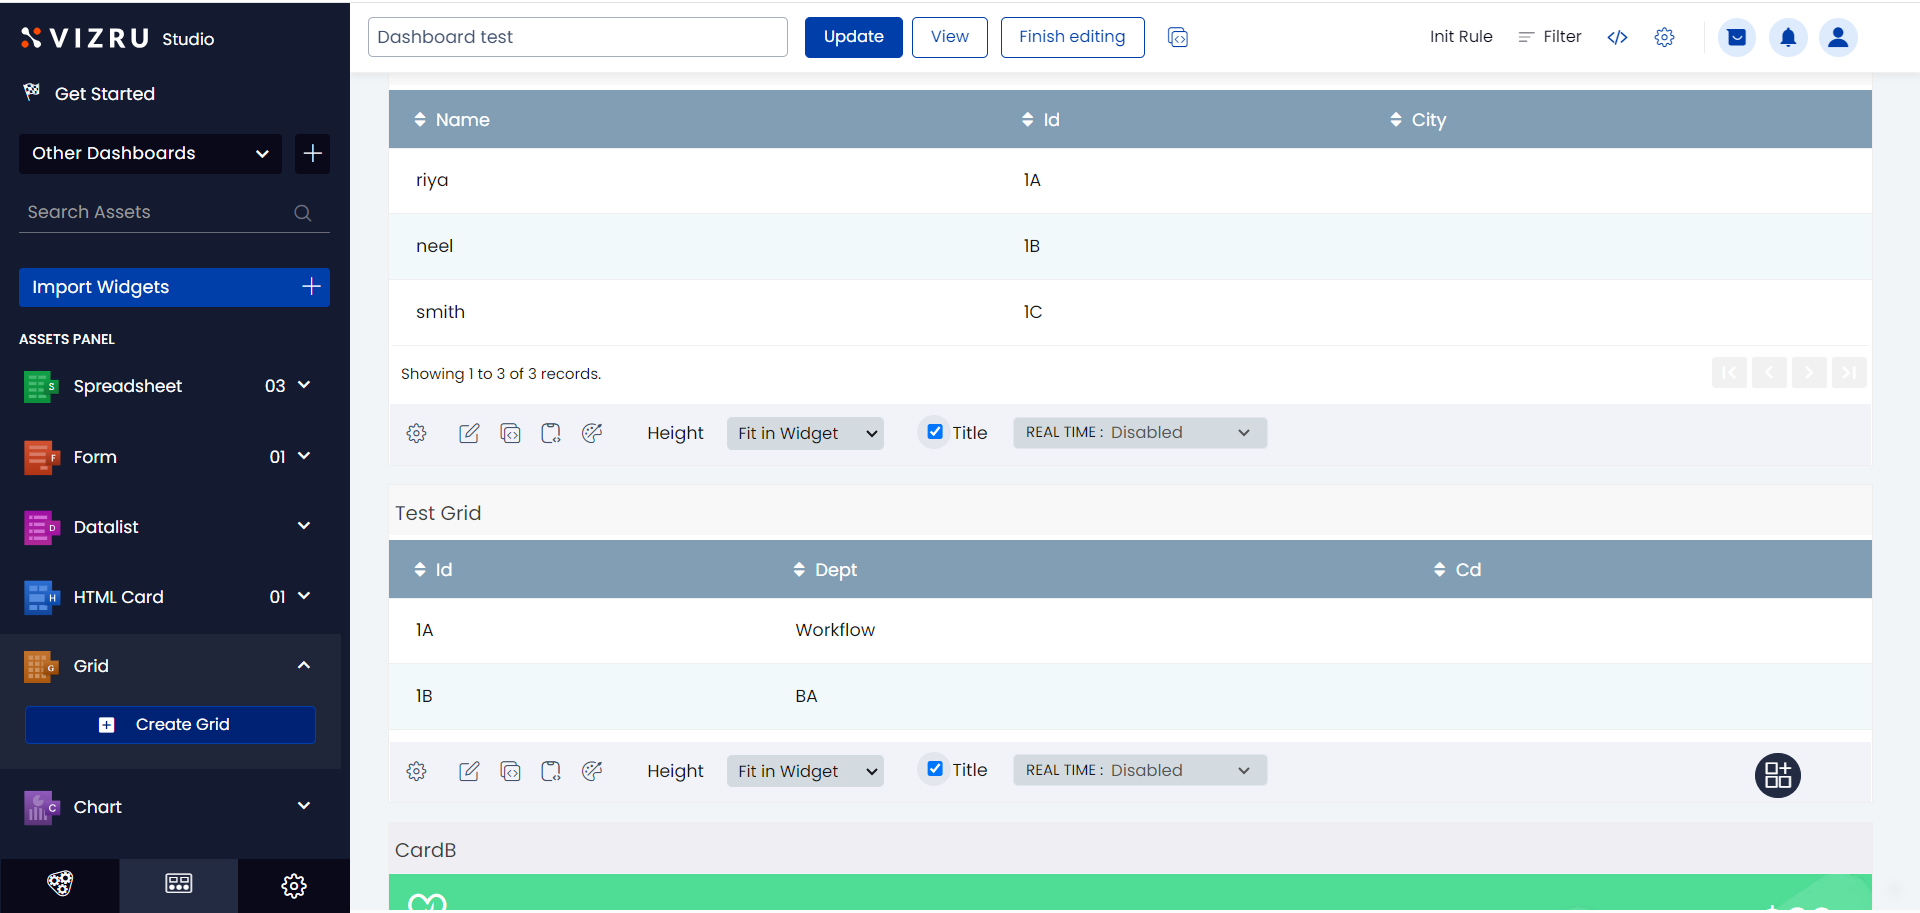
A grid is a visual representation of spreadsheet data.
Creating a Grid
- Go to Dashboard Studio and click Grid > Create Grid.
- The Grid Builder page is displayed.
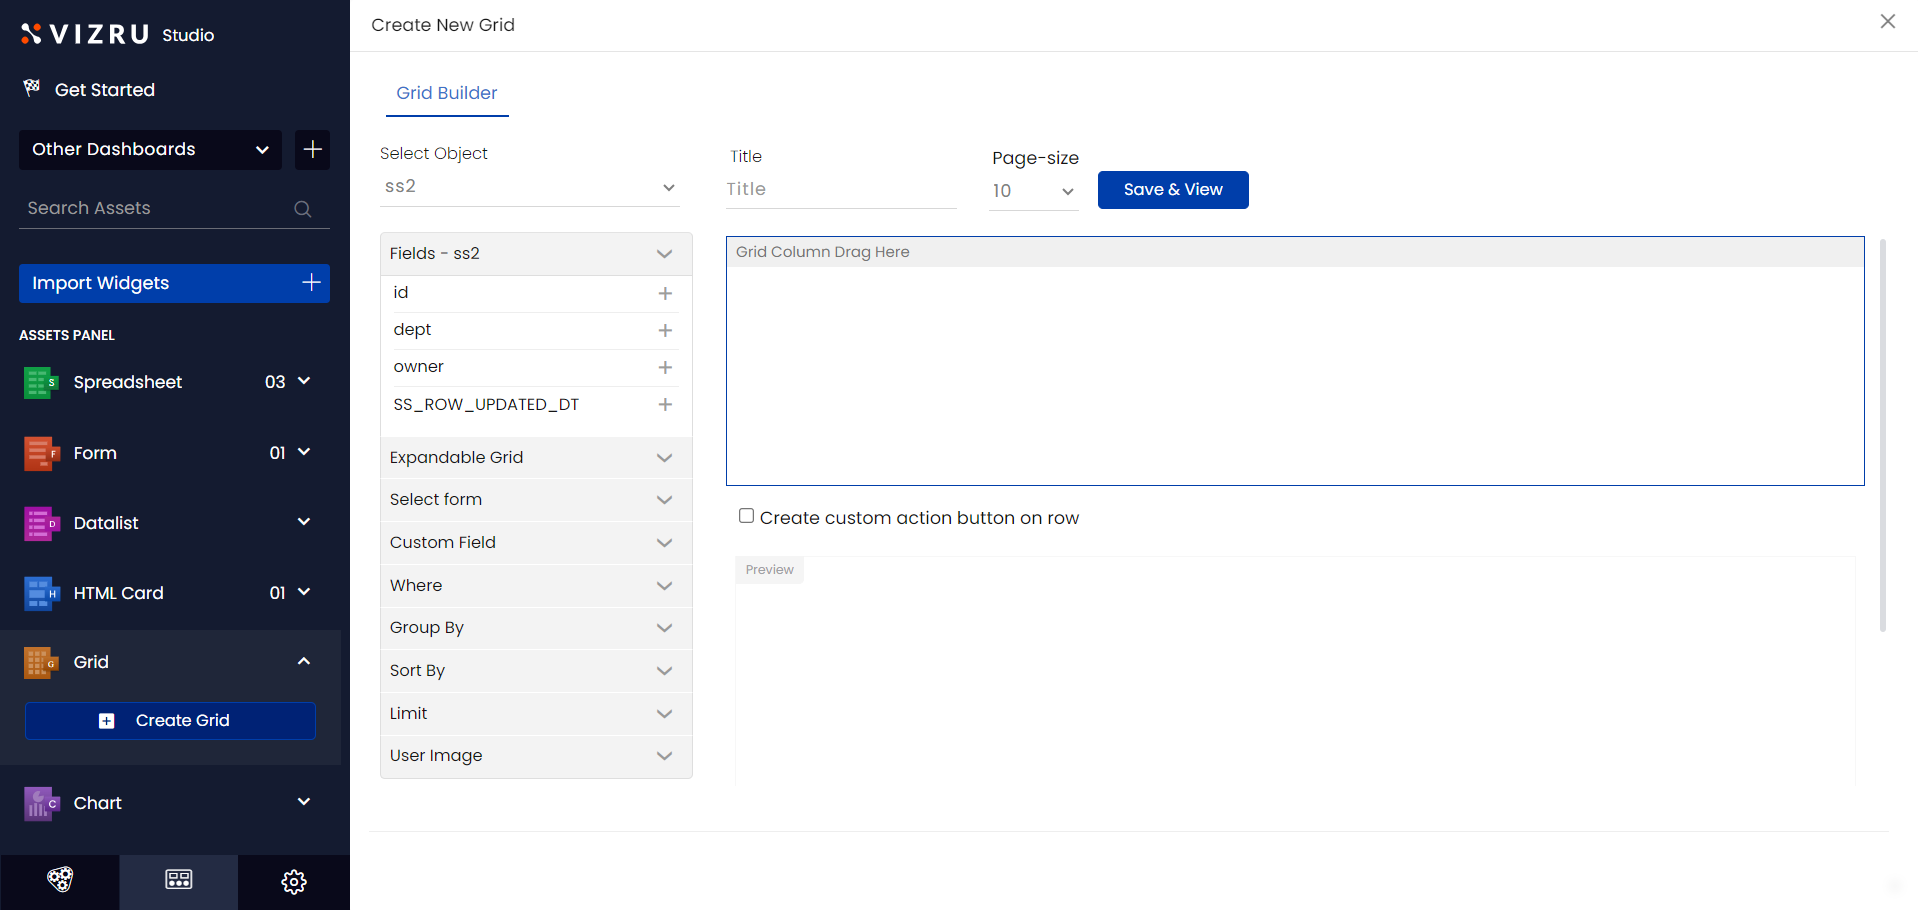
- Select the object or source spreadsheet from the dropdown list, enter a suitable title for your grid, and select Page-size, which sets the number of rows to be displayed in the grid. The fields of the selected spreadsheet are displayed in the left pane.
- Click the
 icon for the fields you want to add to the grid. The fields get listed in the order of selection.
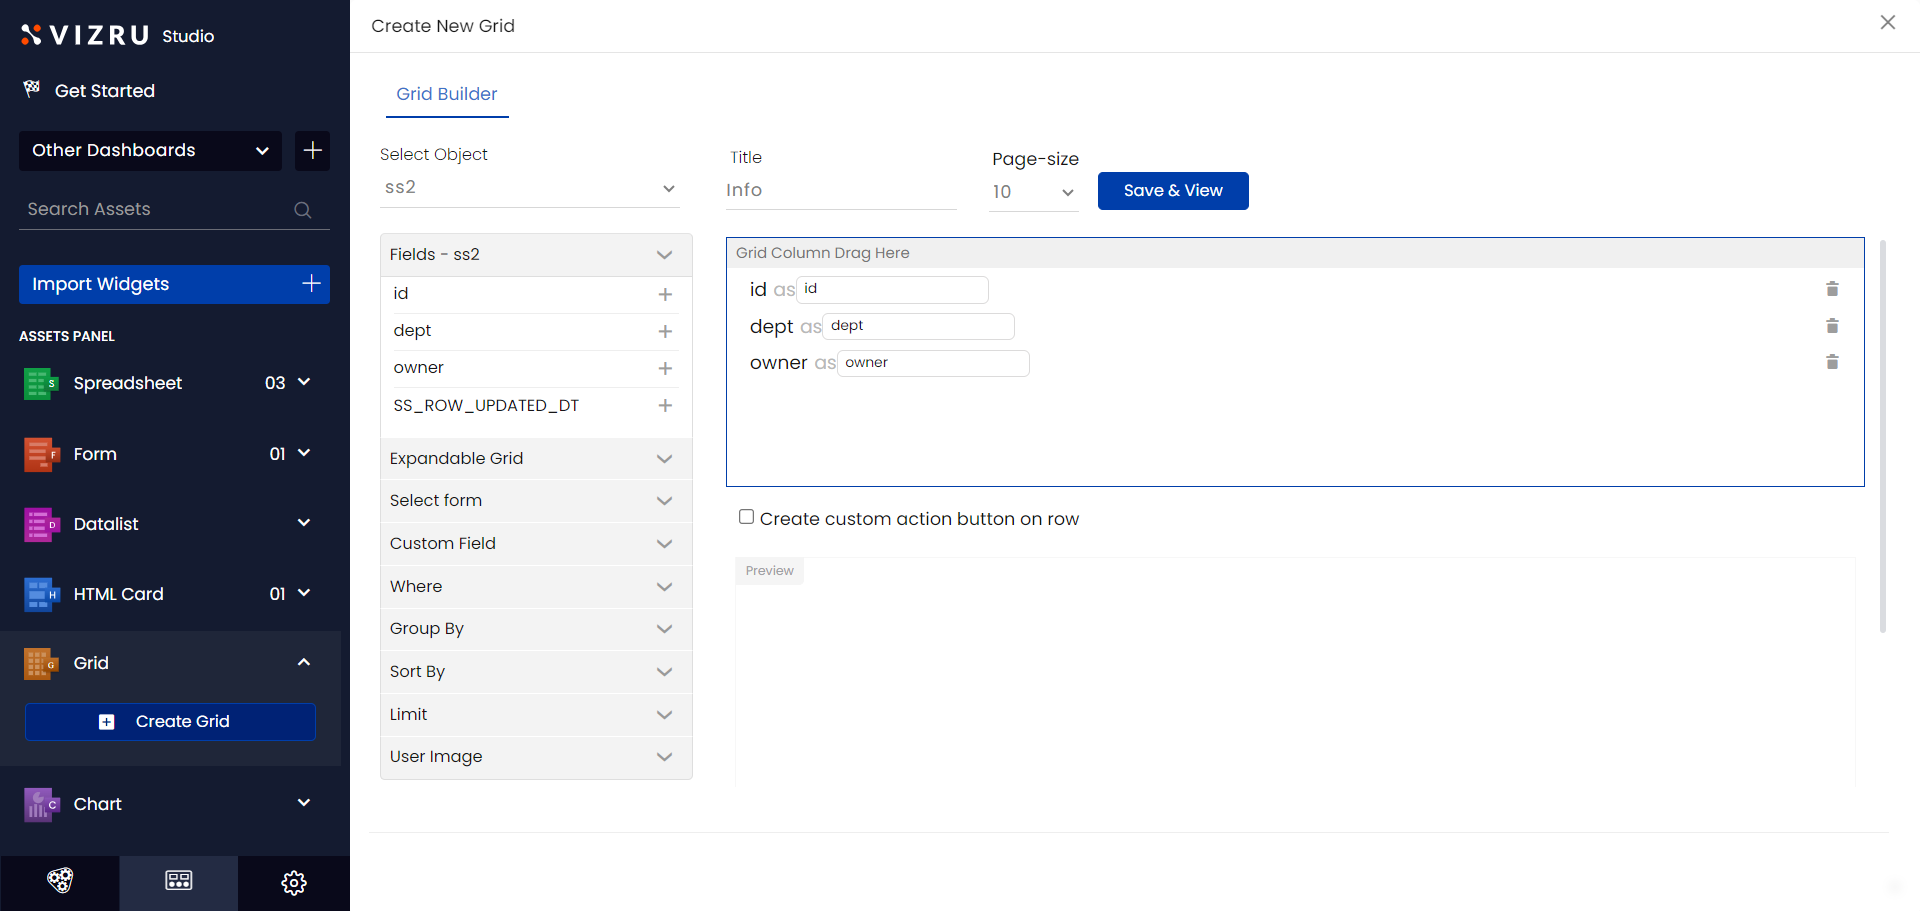
- Edit column name as required.
- Click the
 icon to delete any field in the grid.
- Click Save & View. You get a preview of the grid on the same page.

Creating Custom Action Button on Row
A field value can be converted to an action button. This helps you update the field value in real-time without having to input to your database through a form. On clicking the action button, appropriate workflow gets triggered.
- Select Create custom action button on row on the Grid Builder page.

- Click the icon and add the corresponding field to the panel. The field name, as well as field dropdown values, are displayed. The below example shows the field “Task Status” whose value is shown as a button with dropdowns “Not Started”, “In Progress”, and “Done”.

Configuring Grid Settings
You can configure various grid settings such as group, sort, limit, etc.
- Click Where from the left pane on the Grid Builder page. Enter Field Name and Value, and click “+” to filter or narrow down your search data within the grid.

- The example below shows a grid that displays data associated with “Task Status” “Done”.
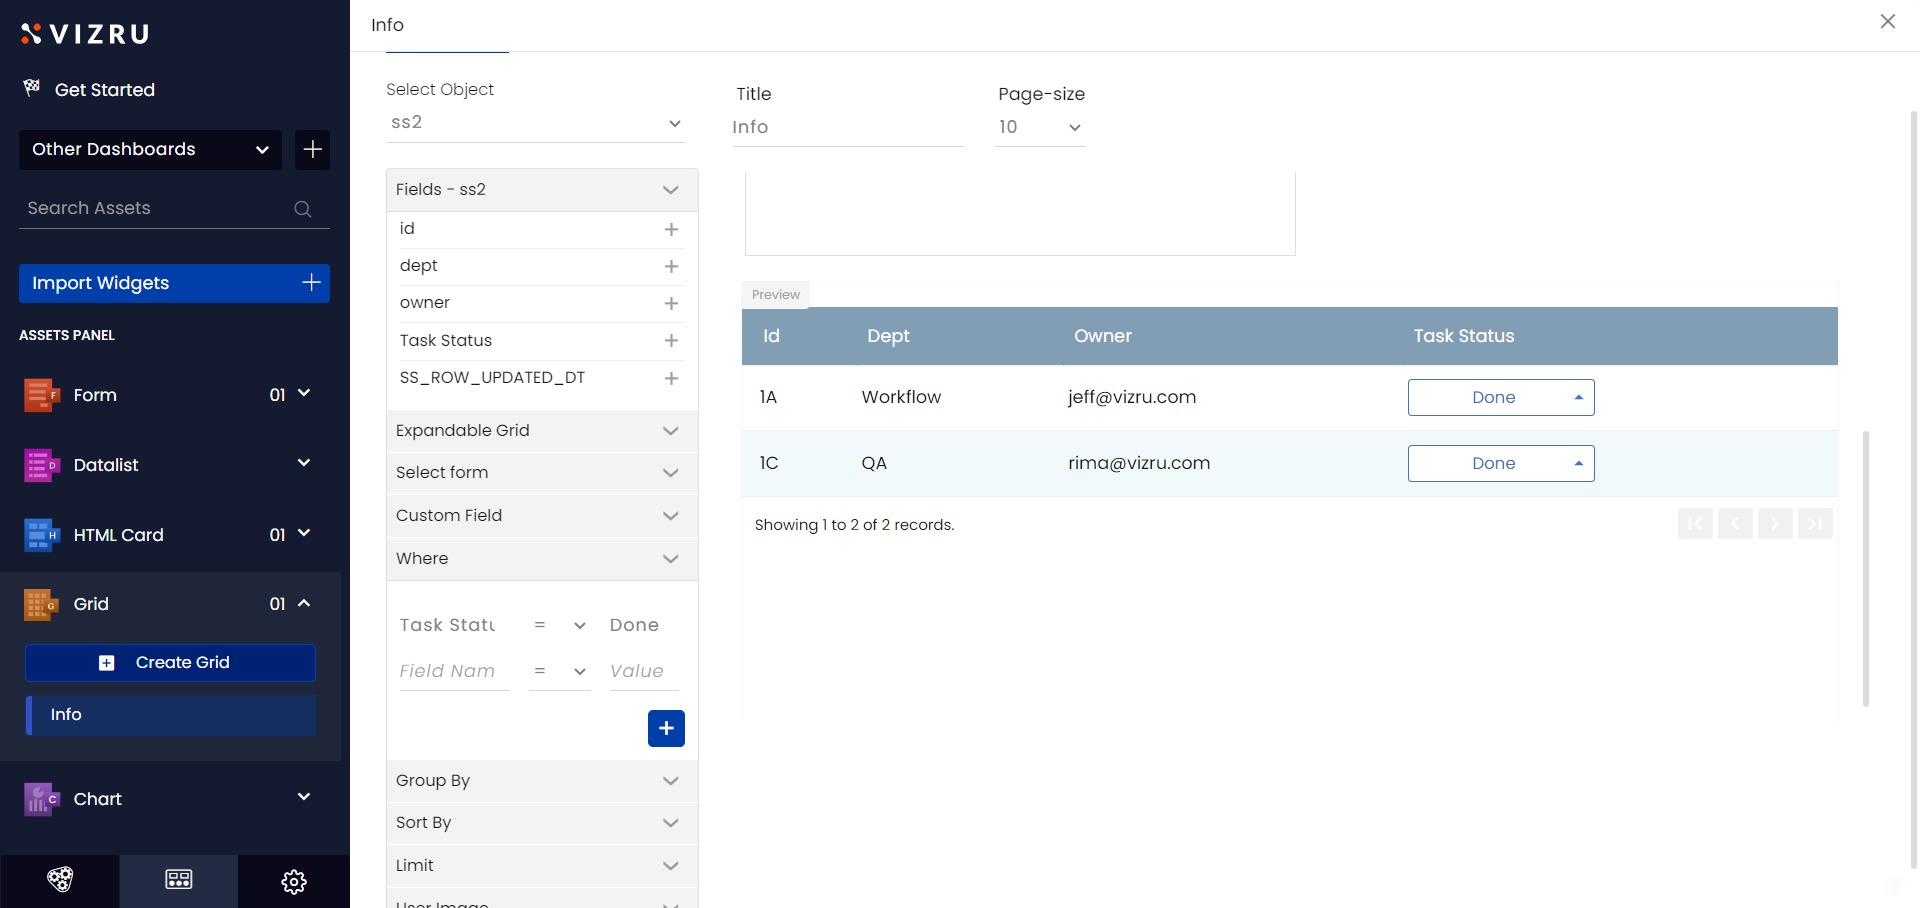
Note: You can set multiple “Where” conditions and these conditions also work in real time.
- Click Group By from the left pane, select the field name from the dropdown list and click the “+” icon to group grid data based on a specific field. The example below shows a grid grouped by the field ‘Dept’.

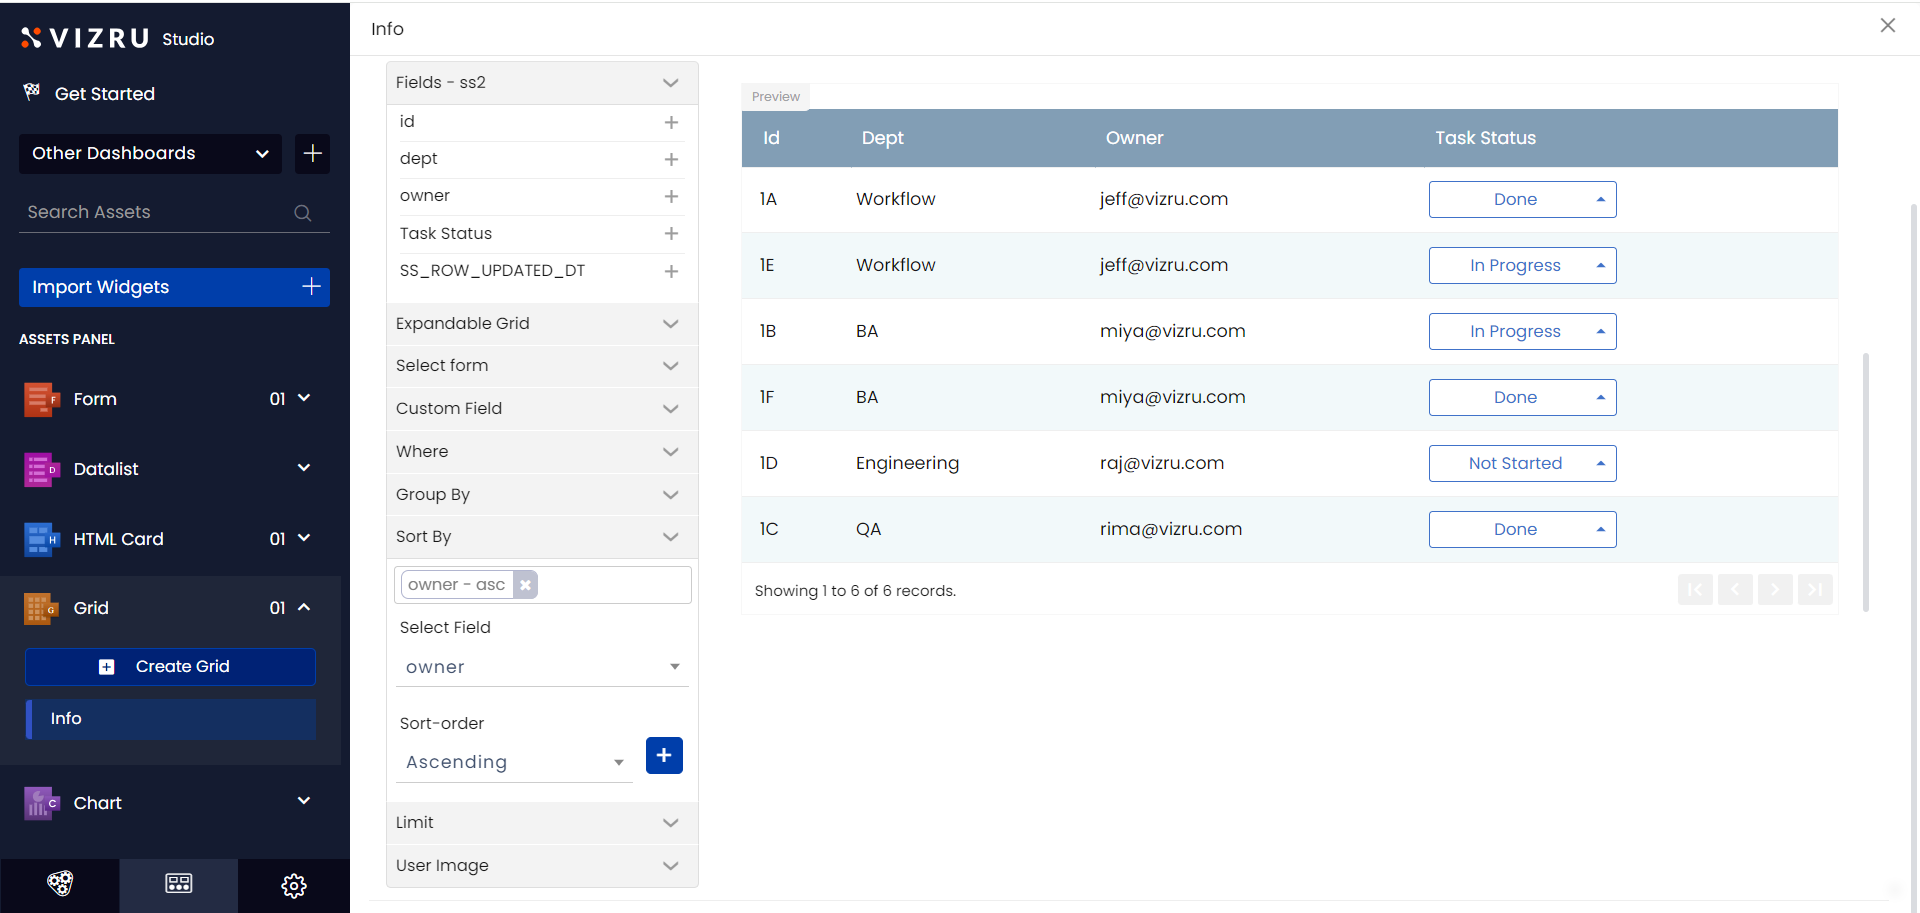
- Click Sort By from the left pane, select the field name and sort-order from the dropdown list, and click the “+” icon to set a default sort and ascending/descending order of values in a column when you open the grid. The example below shows the values of the column “Owner” arranged in ascending order.
- Click Limit from the left pane to set the number of rows you want to display on the grid.
